Getting Started to WeHostVoIP
WeHostVoIP or WeVoIP as we like to call ourselves, is a Multi-ISP, Multi-Tenant Cloud PBX created specially for Communication Service Providers.
Following this guide, you will be able to start a Cloud PBX operation in a few hours. There are several steps to prepare for an operation.
There are several steps to start an operation:
- WeHostVoIP Concepts
- Step 1 - Creating a new ISP
- Step 2 - Creating a carrier
- Step 3 - Creating a service plan
- Step 4 - Creating a customer
- Step 5 - Creating a Dial Plan
- Step 6 - Add numbers to the inventory
- Step 7 - Creating Domains
- Step 8 - Create your first tenant
- Step 9 - Accessing your tenant
- Step 10 - Creating subscribers
- Step 11 - Registering Alice in the WebPhone
- Step 12 - Registering Bob in the Softphone
- Step 13 - Make a call between phones
- Step 14 -Add a country in the security group
- Step 15 - Make a call to an external destination
- Step 16 - Testing incoming calls
WeHostVoIP Concepts
There are three different consoles for WeVoIP.
ISP Console - https://isp.wehostvoip.io \ Tenant Console - https://console.wehostvoip.io \ Phone Console - https://phone.wehostvoip.io
In the ISP console (https://isp.wehostvoip.io) you will configure the master plans for the Cloud PBX provider. You are going to attach carriers, create service plans, adjust normalization rules for numbers and many tasks you will have to do only once.
The tenant console is really the PBX interface, you will create one or many Tenants per customer. There are no limits on the number of tenants created.
Finally the phone interface is a WebRTC where you can make or receive calls. The system also supports almost any SIP phone or device.
Step 1 Creating a new ISP
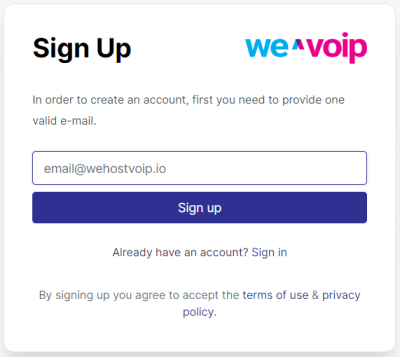
To create a new ISP, you have to start the signup process in the portal isp.wehostvoip.io
Once you press signup, the system will ask you to provide an email for confirmation
Now you have to go to your email and click on the email confirmation link. Once you have pressed the link you will see the ISP configuration link.
Provide a Full Name and password for the username and press next
Now, there are important parameters here. The most important parameter is the namespace. When you start using wehostvoip, to login in the system you will need your own namespace. Please choose a namespace and write down the name you will need in the future. Also important is the currency. Fill the rest of the information and press next.
Now you can customize your logos and colors. \ To access this configuration again, click on the options menu in the top right corner, Settings, Theme.
After finishing, you should choose a plan. The plan prices are in dollars. Please contact us if you wish to have a plan in Brazilian reais.
Once you have finished you will be able to see the ISP interface
Step 2 Creating a carrier
Now it is time to specify where will you terminate your calls. For this getting started we are going to terminate calls using a test gateway called sipa.flagonc.com. You may test incoming calls registering a phone in the same server. I will provide instructions at the right point. For now let's create a gateway and a carrier. A carrier can have more than one gateway for redundancy, but the system does no route per prefix. This is the function of the ISP softswitch or gateway terminating the calls. We didn't want to have redundancy on these functions.
When creating a carrier, the first step is to create the gateway
Name: When creating a gateway, the first thing you add is the name, for example, "primary". \ Address: Next, add the address and port of the gateway, for example: sipa.flagonc.com:5600. \ Display: Display is the text part of the caller ID, also known as the FROM display. \ Outbound Strip: Remove N digits from the E.164 or original number before sending it to the gateway. \ Outbound Prefix: Add this string to the left side of the number before sending it to the gateway, occurs after the strip. \ Inbound Strip: Remove N digits from the number arriving at the SBC's inbound port. \ Inbound Prefix: Add this string to the left side of the incoming number before entering the SBC, occurs after the strip. \ Source Domain: Also known as the From domain, often required for authentication, usually the gateway's address. \ Source User: Also known as the From user, it is the caller ID and is often used for call validation. Check with your carrier. \ Apply to: Used only for the outbound number. Apply the rules to the internal E.164 number or the originally dialed number. \ Attributes: Optional attributes, reserved for technical support. \ Add PAI: Add the P-Asserted-Identity. This may be necessary for some carriers.
After filling in the information, save the gateway and save the carrier. If you need two gateways, create both before saving.
Step 3 Creating a service plan
The service plan is the heart of the system. You will be able to change your customers using a prepaid or postpaid system. You can start with something as simple as charge per month and later create more sophisticated plans to charge per leg or per prefix. In the getting started we are going to create a simple plan to charge only a monthly fee.
Press, create service plan to start creating a plan.
Name your first service plan Default.
Select the Carrier and Dialing Plan. \ For the next two menus below, check the box "No Service Deck", "No Rate Deck"
Then press Create Service Plan, do not leave the page without creating the service plan.
Step 4 Creating a customer
After creating a service plan, you can now create a customer. Just press the customer menu on the right side and press create to create a new customer. Customer is one of your customers who will buy a PBX service. Before you can create a tenant, you have to create a customer.
Step 5 Creating a Dialplan
Internally, WeHostVoIP handles all numbers in the E.164 format with "+" in front of the number. There are different ways to dial in each country. Sometimes you need to prefix the number you want to dial with 9 or 0. However everything has to be normalized to E164. We have created some presets for Brazil and the US. The dialplan has three very important fields. If you want to create a dial plan you need to understand regular expressions. There is the match expression to match the number, the subs expression to separate the number in chunks using parenthesis and the replacement expression to rebuild the number. You may use two variables CC (Country Code of the User) and _AC (Area Code of the User). If you are in a different country, please let me know and I can create a preset for your country to simplify. For getting started I'm going to use a preset for US without 9 as a prefix.

Step 6 Add Numbers to the Inventory
This step is optional
If you have DID numbers or ranges to sell you have to specify them in your ISP. Your users will be able to allocate DIDs for their own users.

Step 7 Creating Domains
This step is optional
You may create a domain directly below your namespace such as customer1.gettingstarted.com. For this you don't need to create a domain. However if your customer already uses Google Apps or Azure AD with a specific domain you can add their domains here. You have to verify the ownership of the domain by adding a TXT in a domain server.

Step 8 Creating your first tenant
Most of the configuration you have done until now are made only once, except for customers. After this configuration you are now able to create a tenant to serve your customers.
To create a tenant is very simple, you start by adding a domain. It may be a subdomain of your namespace or the customer domain previously created and verified. Let's use customer1 here as the domain.
After specifying the domain, you have to specify the Customer, Carrier, Admins, Dialplan and session border controllers. It is a very quick form. Each ISP should negotiate its own SBC for operations depending on the expected traffic. You can use the shared SBC for US sbc-us.wehostvoip.io:60110. Thsi SBC is configured as an outbound proxy for all calls.
Step 9 Accessing your tenant
Click on the view button at the end of the row (close to the delete and edit buttons).
You will get to the Tenant Interface like below.
Once the login is completed, you will access the interface below.
Step 10 Creating subscribers
Now, in the subscriber table, let's create two users, Alice and Bob. There are many fields to add in a subscriber. Let's go through them
- Username - "Authentication Username"
- Email - "Email for communication purposes. It is not used in the authentication"
- Password - "SIP Password for phones"
- Alias - "Alias of the SIP user, we often use the alias as the extension"
- VoiceMail to Email - "After failing a call, the caller will be able to left a voice message in the subscriber's email"
- Area Code - "Area code of the user"
- Caller ID - "Overwrite user's caller ID with this caller ID"
- Date Range - "Group of time rules defining the business hours"
- Visual Plan - "Used only to receive calls"
- Security Group - "Security group authorizing country prefixes"
- Language - "Used for Text to Speech generation"
- Call Group - "Numeric group for Source of Pickup Call"
- Pickup Group - "Numeric Group for Pickup a Call"
- Softphone password - "Password for the softphone and webphone"
- Forward, Forward Busy and Forward no Answer -"Call forward configurations"
- Maximum Concurrent Calls - "Maximum amount of concurrent calls"
- Dial timeout - "How much to wait for the user to pickup a call"
Don't forget to add a password for SIP and for the Softphone, write down the password you will need the password ahead
Step 11 Registering Alice in the WebPhone
To register Alice in the webphone, just go to the url https://phone.wehostvoip.io and add the name and password. At this point we still cannot log with Google or Azure. To do it it is required to register and verify a domain. You will only be able to log with Google or AzureAd if you have a synchronized domain. We have a special chapter for this.
Once you login you should see a green circle in the upper right hand corner.
Step 12 Registering Bob in the Softphone
This is the free client for WeHostVoIP. If you prefer to use a full Unified Communication phone, contact us for an upgrade plan, as the UC phone is charged separately. Branding a new UC phone takes a lot of steps including the registration for a DUNS number and publishing on Apple and Google Store. These features are not covered in the Getting Started.
You can only use the softphone if you are using Windows 7 or later. Download the softphone from https://isp.wehostvoip.io/downloads/wevoip-3.20.7002.exe, extract and run the file
After the installation, log in using the username and softphone password.

Step 13 Make a call between phones
Just call Alice and Bob by their names. You may use also their aliases alice (1000) and bob (1001). Dial 1000 from bob and 1001 from alice to test the dialing.
Step 14 Add a country in the security group
To avoid fraud, subscribers are not allowed by default to make PSTN calls. You will have to authorize the countries or prefixes to enable outbound calls. We've made this process very easy. In our cas we are adding USA. When you select USA it selects all area codes from the NANPA belonging to the USA and does not load Caribbean destinations frequently used for fraud.
After adding the codes/countries, click on save.
Step 15 Make a call to an external destination
Dial 2092488700, you should receive a funny message. As we are using the test gateway your call is not going to the PSTN. If you want your call to go to the PSTN you have to add your own carrier.
Step 16 Testing incoming calls
To test an incoming call is a little harder. If you have added a real carrier and you have real dids, the process is very easy. However for the purposes of this Getting Started Guide we are going to use a softphone connected to the test gateway to connect to our SBC demo.wehostvoip.io.
For more details, check our document Handling Incoming Calls