Connecting your ISP to a Carrier
To complete this tutorial you should have a valid account on AWS.
In this chapter we are going to integrate WeHostVoIP with signalwire and AWS voice connector.
You can connect virtually any SIP service provider. In this section we will show you how to connect to AWS voice connector. The reason we are using AWS is because it is simple and largely available. We do not endorse or recommend AWS Voice connector, we are just using it as an example. If you are a service provider and wants to be featured at WeHostVoIP, get in contact.
Step 1 Creating the SIP trunk on AWS
Access the CHIME console on AWS
https://console.chime.aws.amazon.com/
Step 2 Create a new voice connector on AWS
Calling=>Voice Connector
- Name: gettingstarted
- Region (east-se - N.Virginia)
- Encryption: Disabled.

Step 3 Create a termination on AWS
Click in getting started
Select the tab Termination
Set enabled and suthorize the address demo.wehostvoip.io. When recording the instructions the host was 44.196.134.37. Use ping to demo.wehostvoip.io and confir this address pelase. It may change in the future.


Set calls per second to 1, calling plan, authorize only your own country. No credentials required the IP is authorized.
Step 4 Create a new carrier on WHV
Now you will need to create a carrier and gateway in the WeHostVoIP side. When creating a gateway add the outbound host name as the address and from domain.
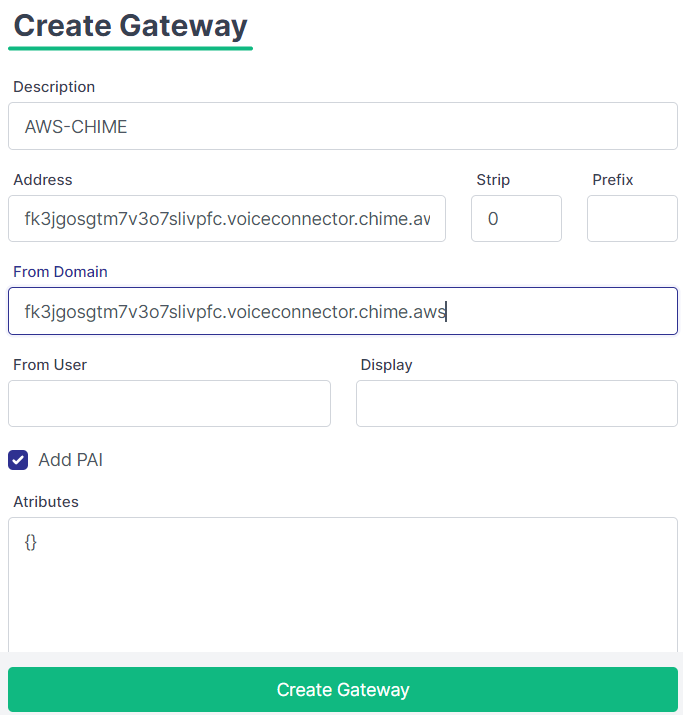
After adding the gateway associate to the carrier. In the description set AWS-CHIME

Once the termination is created you should be able to call other numbers in US.
Step 5 Assign a phone number on AWS
AWS does not support receiving calls without a Caller ID in the E164 format. So let's assing a new nember. Allocate a phone number on AWS-CHIME on
calling=>phone number management.
Allocate one number and associate it with your connector.

Step 6 Change the carrier in the Tenant on WHV
To use this carrier, you have to change it in the tenant configuration (ISP interface)

Step 7 Add the prefixes to the security group
Go to the security groups, add the prefixes for USA by selecting the country. Add also the prefix for toll free calls, add 18 as a prefix, it covers all variations of toll free calls.
Step 8 Try to make an external call
Call a toll free number such as 8004337300
Step 9 Add the AWS number to the inventory
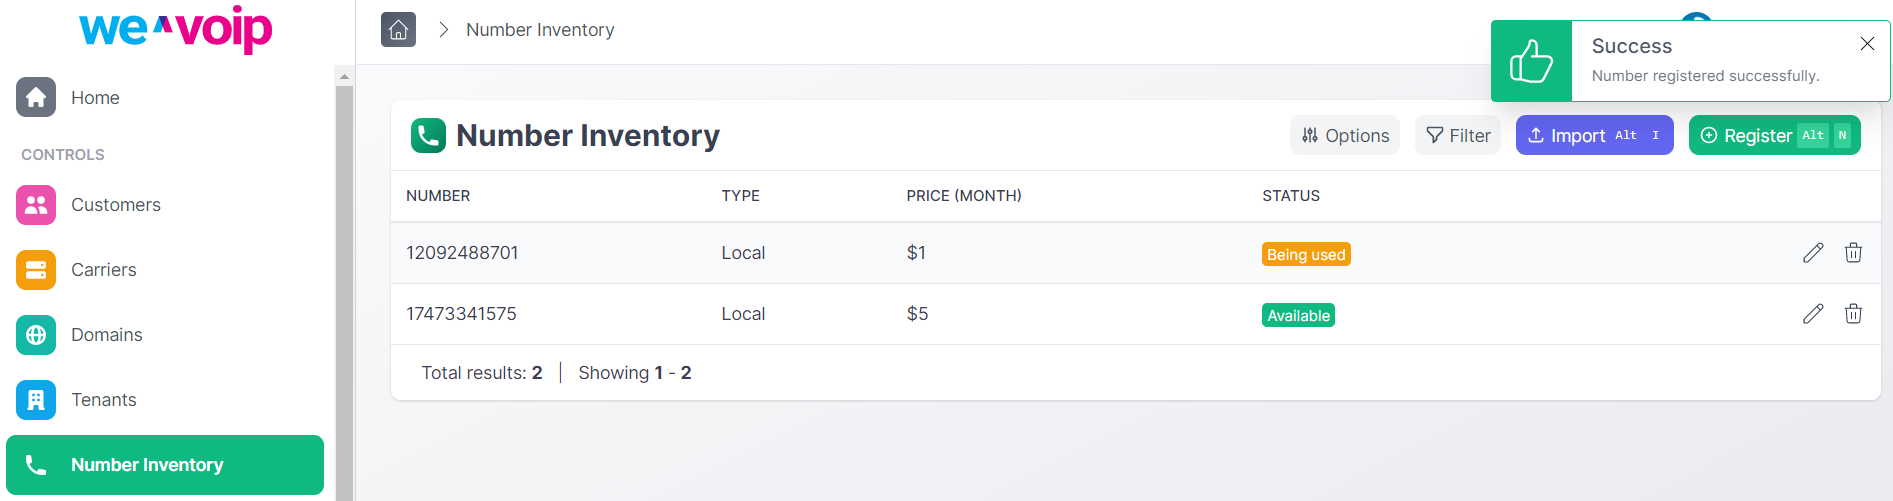
In the ISP interface go to number inventory and insert the number record.

The data to be inserted depends on the number allocated on AWS
After adding the number should appear in the system
Step 10 - Associate the number to a user in WHV
In the tenant interface in phone number, create the number and associate to Alice.

Step 11 - Dial the number from an external phone
Check if the call has arrived ok.